
One of the most common issues in bathrooms is mold, which is caused by moisture buildup from all of those watery areas, including sinks, toilets, and showers. The best way to combat this issue is to have proper ventilation in this room, to eliminate the moisture and prevent the growth of mold.
Though most bathroom exhaust fans are placed in the ceiling, this isn’t always possible if you don’t have an attic to vent the fan through. Luckily, learning how to install a bathroom vent through a wall isn’t as difficult as you may think.
There is a bit of work involved in this process but you can accomplish this DIY home project yourself if you have the right tools and a bit of time to get it done. If you need a bathroom vent but aren’t sure of the process, check out the following steps.
 If you’ve never attempted a project like this one, it may seem quite tricky to get it done. This isn’t the case, though. There are only a few steps to follow when it comes to installing a bathroom vent through the wall of your home. These steps aren’t overly complicated, either, so even beginners to this type of installation can likely get it done on their own or with minimal help.
Before you get started with any project, it’s important to gather the necessary tools and materials for the job. This way, you don’t have to stop in the middle of the work to find something you need or run out to the store to pick up something you’ve forgotten. This is especially important for bathroom jobs since this room is one of the most used areas of your home and you can’t keep it occupied for hours at a time, especially if you only have one of them for your family to use.
Collect the following items for your bathroom vent project:
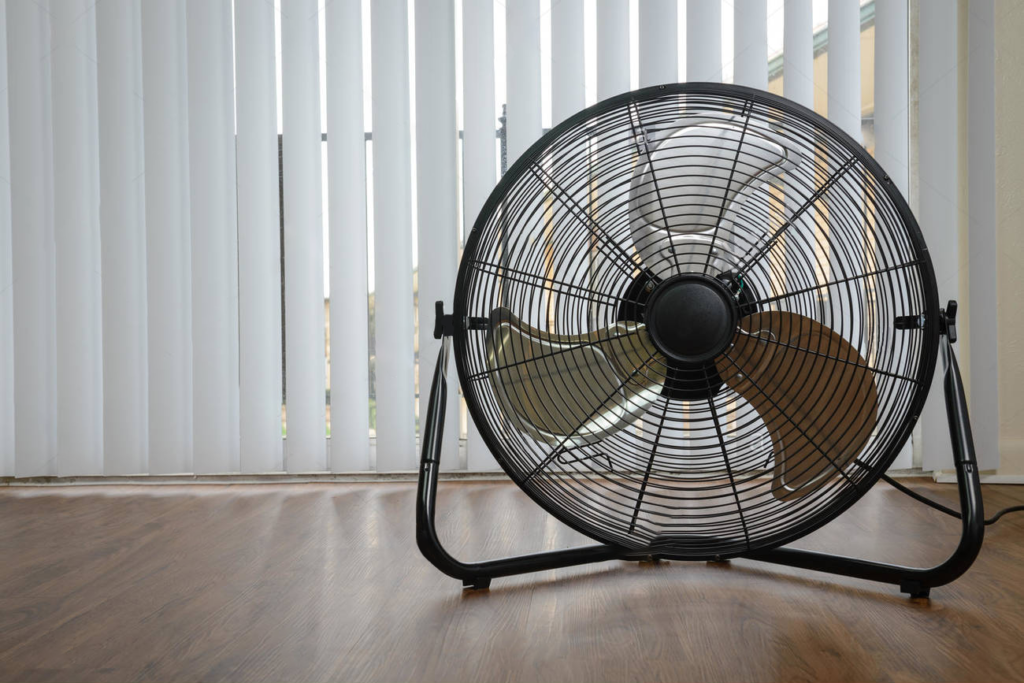
Though you may have many of these items on hand, there may be a few you need to purchase. The exhaust fan is one of them. Though there are several different wall-mounted exhaust fans available, you can choose a ceiling fan if needed. It may take a bit of extra work by adding some extra ductwork to attach the vent to the ducts but this is minimal.
There are several different types of bathroom exhaust fans to choose from. There are the basic models, like the Panasonic FV-30VQ3 WhisperCeiling 290 CFM Ceiling Mounted Fan, which includes detachable adaptors, adjustable mounting brackets, and a built-in damper, among other great features.
There are also various other features included, like bathroom exhaust fans with a light or a bathroom heater combined with an exhaust fan. There are also a few more modern extras. The Broan Sensonic Bathroom Exhaust Fan with Bluetooth Speaker is popular since it allows you to wirelessly link to your Bluetooth-enabled device for some music while it removes the moisture from the air.
 Once you’ve gathered all the items you’ll need to install your bathroom vent, it’s time to decide where you’re going to do the actual installation. Turn off the electricity to this area of your house to avoid electrocuting yourself when dealing with any wiring. Put on your goggles and gloves to protect your eyes and hands from dust and sharp tools.
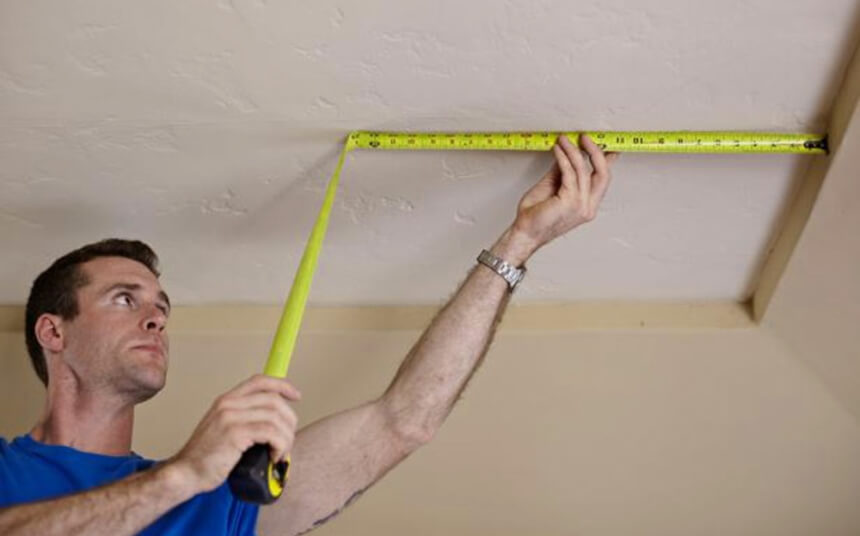
Choose an outer wall and select the spot on it that you plan to place your exhaust fan. This spot should be as high as possible without any outdoor obstructions to block the ventilation. Using your stud finder, find the studs in this area of the wall.
You can also drill a little hole and insert some fish tape horizontally until it reaches the stud. Mark the studs using your marker or pencil and measure this area to be sure the fan you’ve chosen fits between them.
After marking your studs, you can take your cutter and cut through the drywall to make your hole. Try to stay as close to the marks you’ve created for the fan size, though you don’t need to worry about any rough edges since the fan should cover these after it is inserted.
Once the drywall is cut out, you can remove the insulation layers using a handsaw. You may need to add some wood pieces to the top and bottom of the hole to seal it and prevent airflow through the wall from the fan, though this depends on the type of exhaust fan you’ve purchased.
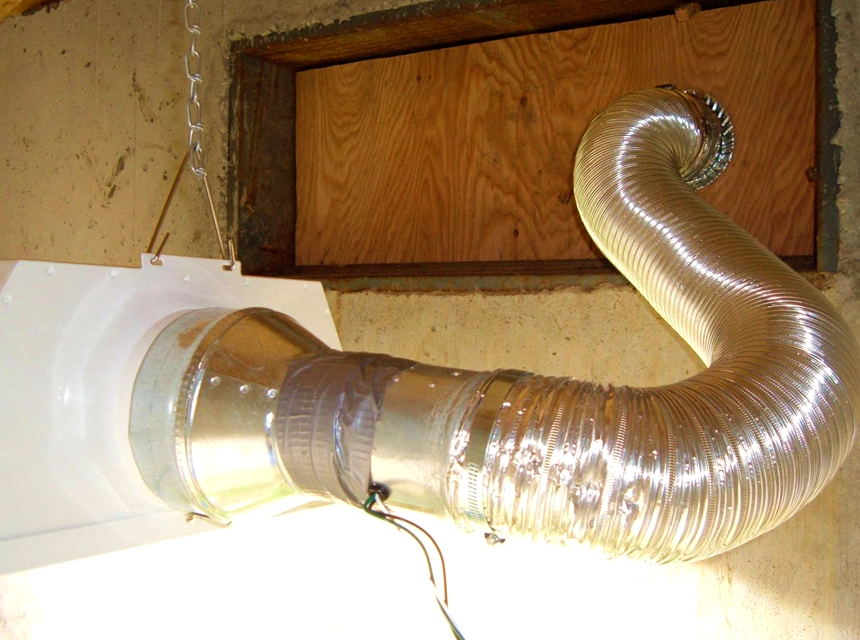
Use your drill to mark the inside hole edges, which ensures that they line up when you cut through the outside wall. Head outside, find those holes, and trace them to create a pattern. Then use your handsaw to cut the outside wall. This step is only necessary if you are not using ducts for ventilation Trusted Source Ventilation | DIY | The Guardian Keeping your home comfortable depends on far more than insulation. Here, George shows how to add ventilation and defeat drafts. www.theguardian.com . If ducts are used, you only need to cut an outside hole that matches the duct size.
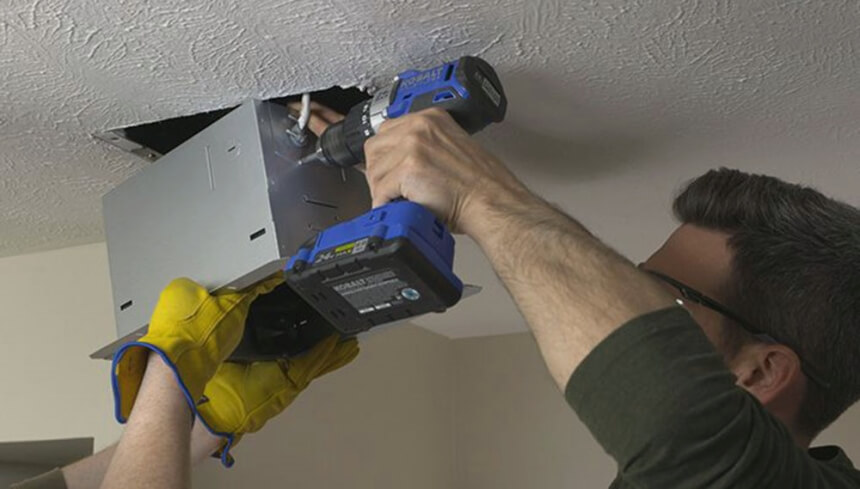 Once your wall is ready to go, it’s time to install the vents and exhaust fan. Begin by screwing the vents into place, then secure the ducts. Attach the housing using its fasteners to reduce vibration and noise while the exhaust fan is running.
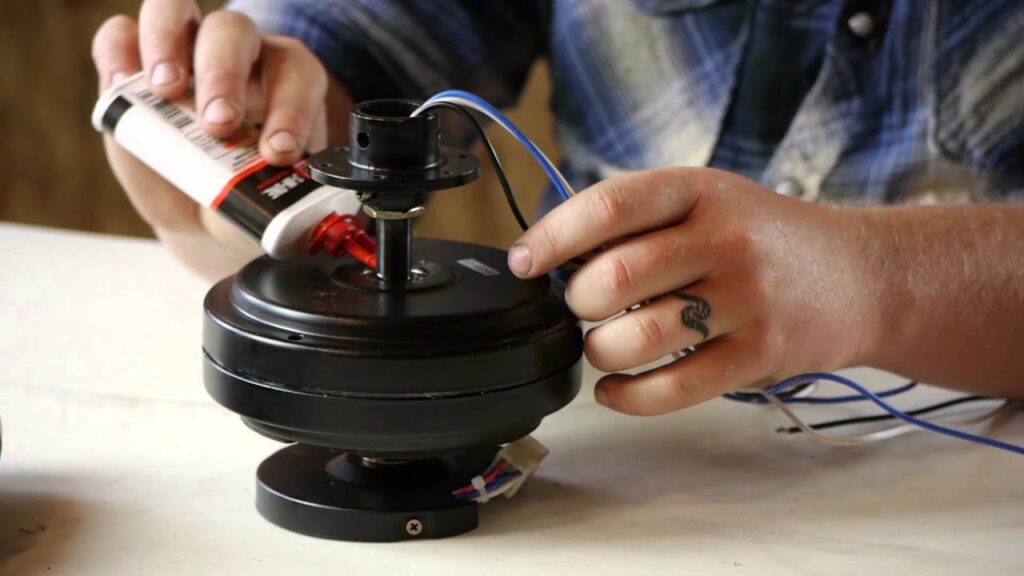
When these pieces are in place, you need to connect the wires on the unit to the power source. This can be a bit tricky if you aren’t sure what you’re doing, so if you aren’t comfortable with this step, you can have an electrician do this part of the installation for you. Some models are easier to hook up since they only need to be plugged into an outlet, so check your unit before getting started.
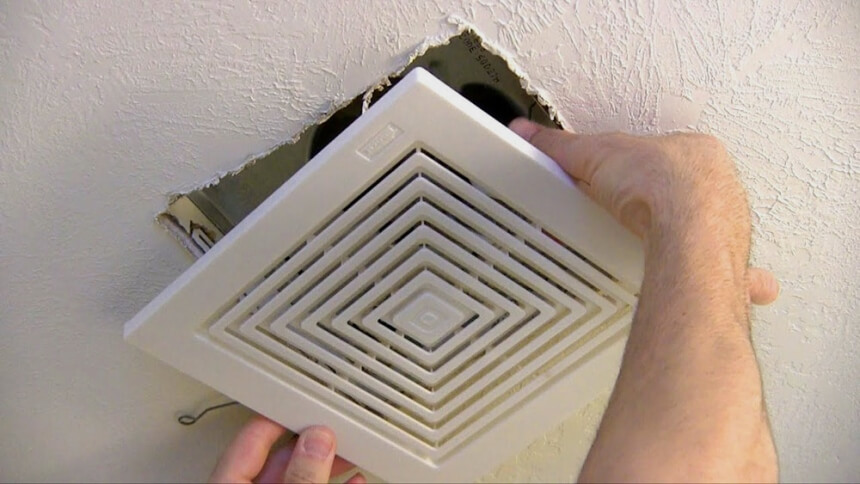
After connecting the wires, attach the exhaust fan to the housing and put the cover in place, making sure everything is the right way before you secure it. You may also need to attach a frame, depending on the type of exhaust fan you’ve installed. This will seal the edges of the unit to prevent water leakage on the inside and outside.
 Now that your bathroom ventilation system is in place, you can turn the electricity back on and try it out. You can safely create some smoke to ensure that the fan is sucking the air in and sending it out through the outer vents as well if needed.
Though older homes may not have exhaust fans installed in their bathrooms, they are a requirement in more modern dwellings. If your bathroom is without one, learning how to install a bathroom vent through a wall may be a good idea, especially if you don’t have an attic or are unable to access it to install a ceiling exhaust fan.
The process is quite simple, needing only a few hand tools and other items, plus a bit of your time, to get it fully installed. Once you have it in place, you can use this fan to remove any moisture or nasty odors from your bathroom, keeping it free of mold and smelling fantastic, no matter what you and your family are doing in there.